


Want to make your website’s homepage engaging and dynamic?
Add auto-updating blog posts.
This keeps fresh content front and center on your main page and gives potential clients a reason to continually come back to your website.
If you have a Showit website adding auto-updating blog posts to your home page is easy. Why?
Because Showit integrates fully with WordPress, the most powerful (and popular) blogging platform to date.
Related: Why Showit is Our Favorite Website Platform
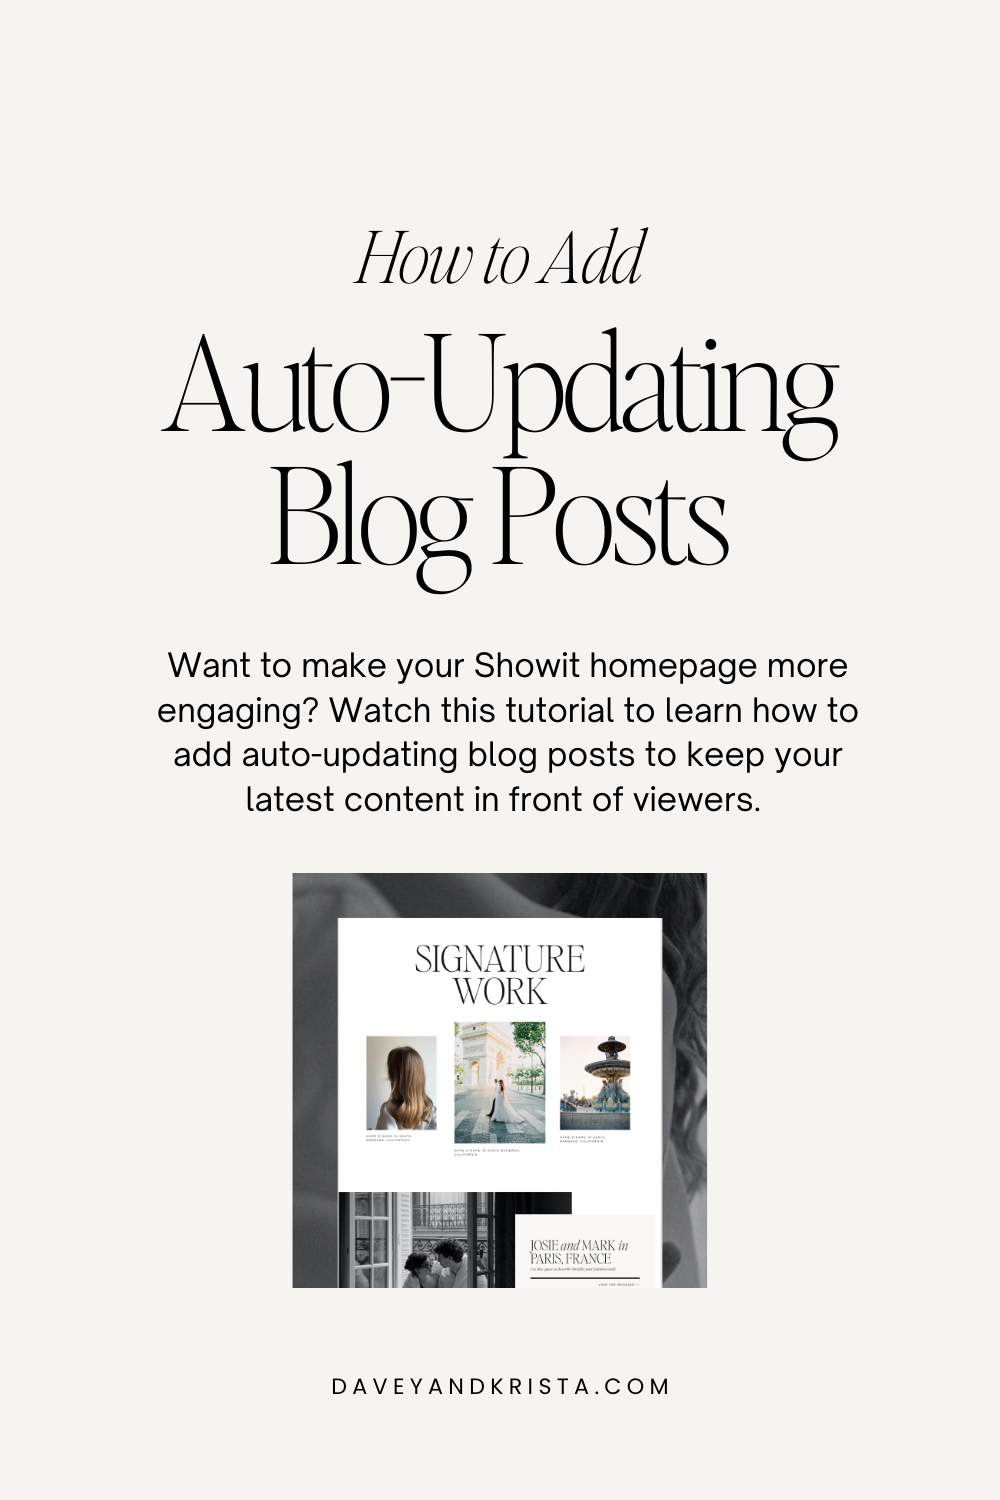
We created a video tutorial that shows you how to set up your Showit homepage to automatically pull in posts from your WordPress blog. In this tutorial, we customize our Marseille design.
This homepage addition is fast and simple but can make all the difference for increased blog engagement.
Watch the video tutorial, and then take a look at our tutorial with steps and resources below.
Let’s break down the process:
1. Locate the Blog Section of your Website
The first step is locating the blog post in your Showit design. Most of our DK website designs have a Blog or Signature Work section directly on the home page.
If you’re just getting started with Showit, you can work with their team to migrate existing blog posts from a different WordPress account or Squarespace. Showit makes this easy!
Showit’s support team handles this migration for you, and you can try Showit for 30 days for free.
2. Create a New Homepage in Showit
Once you’ve located the blog section of your homepage, select and duplicate your homepage down to the blog section. Rename it Home Old.
Then click the Unpublish button in the right bar.
Select the new homepage you just created in the blog templates area and rename it Home.
Switch to the page view of your new Home page, locate your template information on the right side of your screen, and select Front. This will make your new Home page the front page of your website.
Now it’s time to head over to WordPress!
Related: Showit and WordPress Overview
3. Change the WordPress Settings
In WordPress, click the Pages tab on the left side of your screen. Open it and make sure the page title is Home. If it isn’t Home, type the correct title in the textbox.
You want the URLs on both Showit and WordPress to match exactly.
Next, locate the Settings tab within the left sidebar on WordPress. Within Settings, select the Showit tab. Then on the Showit Settings page make sure there is a checkmark in the box next to Homepage. If there isn’t, click the box to add one.
This will ensure that the WordPress posts are properly loaded to Showit.
Then go back to the left sidebar of your screen and locate the Reading tab. Click Reading to open the page. In the Reading Settings page, open the Homepage expandable menu and select your new Home page.
Click the Save Changes button at the bottom.
4. Publish the Changes in Showit
Go back to your Showit website editor and click the Publish button on the top right corner of your screen.
Look for the pop-up message confirming that the blog was successfully published.
Related: How to Customize a Showit Website Template
5. Finetune your Homepage Display
Now it’s time to fine-tune how your blog posts appear on your homepage and which ones you want to display.
Within Showit, toggle to the Page tab on the left sidebar and locate the Featured canvas. Click Featured to select the canvas.
Then in the drop-down menu on the right side of your screen, change the canvas from Static Canvas to Post Views Lookup.
The default settings will automatically pull your latest blog posts onto your homepage. If you want specific blog posts to be featured instead, keep reading. We’ll show you how to do this in a moment.
6. Customize Your Blog Post Views
Locate the Page tab on the left side of your screen and select your Featured canvas again. Click the three dots on the right side of Featured.
Then select Create Canvas View and rename it View 1. Repeat this to create two additional views.
Name these views: View 2 and View 3.
Now it’s time to add the content into your three canvas views. Using your cursor, select the image and text of the first blog post. Then drag and drop it into View 1. Repeat this process for each corresponding view.
Then you need to change the settings on each view to automatically pull in the correct details from WordPress.
Do this on the right side of your screen.
Set the image of view one pull in a featured image from WordPress.
To change the text, go to Text Properties and locate the WordPress placeholder. Open the drop-down menu and select Post Title.
Repeat this for the remaining two views.
7. Create a New Category in WordPress
Unless you want your Showit homepage to only pull in the most recent posts, you’ll need to create a new category in WordPress.
We recommend creating a new category because it will keep things organized and ensure you only feature your blog posts on your home page.
Open your WordPress dashboard and locate your Posts tab on the left side of the screen.
Select Categories and then Add New Category.
Name your new category Featured. This category will be used to note every blog post you want featured on your Showit homepage.
Now go back to the Posts tab on the left side of your screen and choose the blog posts you’d like to feature.
Click Quick Edit and then under the Category dropdown, select your new Featured category.
You’re almost at the finish line! With one quick stop back in Showit, you’ll be all set.
8. Publish in Showit
It’s time for the final publish! Go back to your Showit website editor and click the Publish button on the top right corner of your screen.
Remember to look for the pop-up message confirming that everything is all set.
You did it! Your Showit homepage should now automatically pull in your WordPress blog posts, including featured images, titles, etc.
Wrap Up
Adding auto-updating blog posts to your website’s home page is a simple way to make it more engaging and dynamic.
Hopefully, this video tutorial has streamlined the process–making it easier for you to keep fresh content in front of your audience.
If you fell in love with our Marseille website design while watching this tutorial, you can view it here. Another popular favorite is our Rosemary design.

Krista is the co-founder of Davey & Krista, a creative studio known for high-converting Showit website templates crafted for photographers, creatives, and entrepreneurs. With over 15 years of branding and marketing experience, she helps business owners launch stunning websites without the tech overwhelm. Krista also teaches designers how to turn their creative skills into a thriving business—through templates, courses, and behind-the-scenes strategy. When she’s not designing, you’ll find her chasing sunshine, color palettes, and gluten-free pizza.
Explore website templates and free resources at daveyandkrista.com.


VIEW THE COMMENTS
Add A Comment