Blog posts with lots of images present a few challenges, but one in particular: balancing site speed and load times with providing high quality images.
Here’s the problem:
The time it takes a page to load affects a visitor’s experience which affects SEO. Visual artists, especially photographers, want to blog the highest quality version of their work. This is especially important as screen technology like “retina-displays” improve.
But images sized for retina are a beast to load. Slow load times increase the likelihood a visitor clicks “back” which results in a “bounce.” Bounces indicate to Google that the web page didn’t deliver relevant content. A high bounce rate may result in lower rankings on search engine results pages (SERPs).
So, how do we optimize our images so they look great while not destroying site speed?
How to Optimize Images for Search Engines
We optimize our images primarily through adjusting their size and adding alt-text. If needed, we add a caching plugin that increases load times.
How to Optimize Image Size
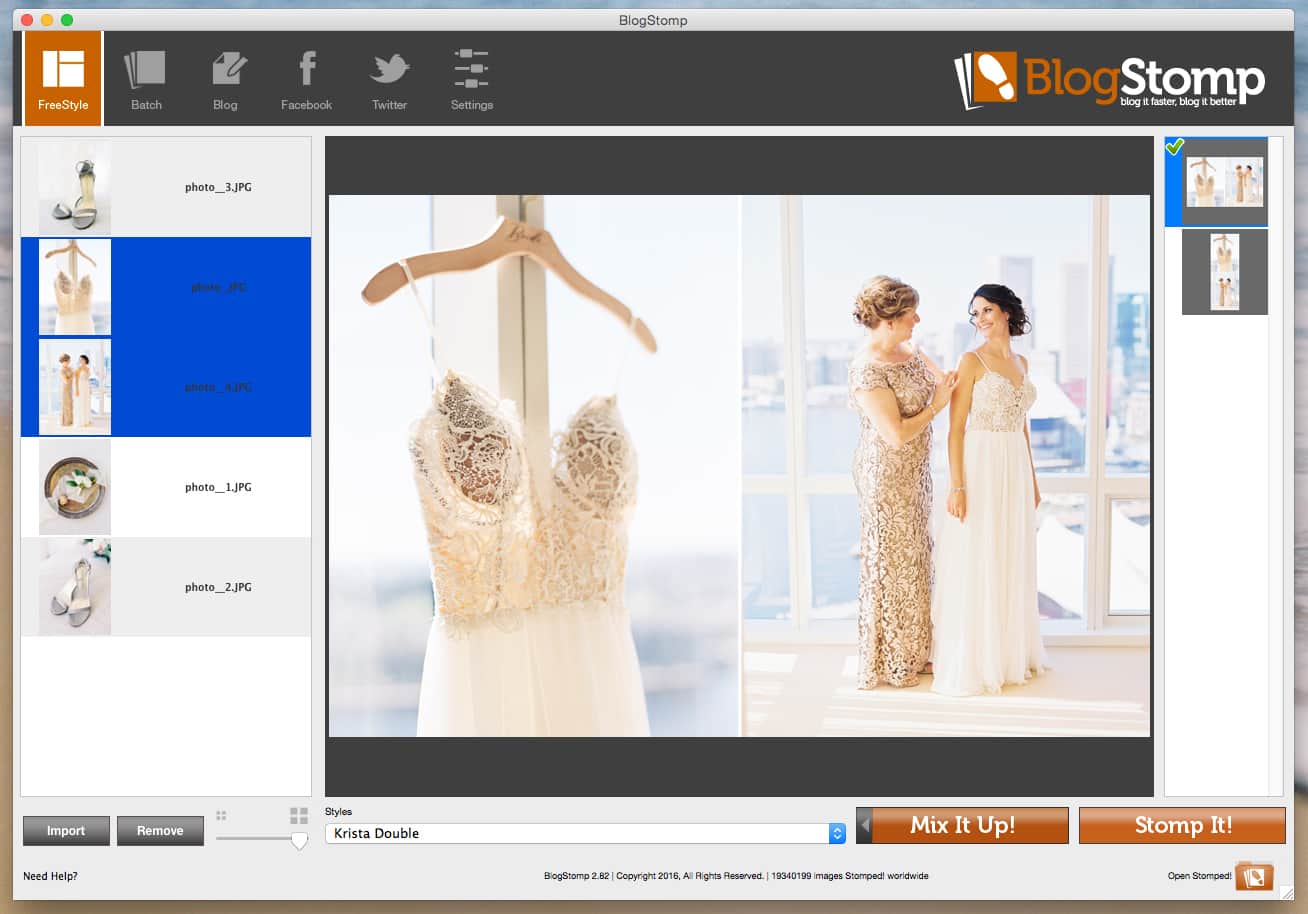
We use Blogstomp to size our images, sharpen them for web and pair vertical images together. Blogstomp makes it easy to pre-determine the size you want your images to be and then select either one or two to “stomp” together.

Retina displays need twice as many pixels to display an image perfectly crisp. But images of that size take longer to load. Because we don’t want our images to be too large, we export them at a size that is about 40% larger than the size they appear on our website.
On this website images end up being about 570 pixels wide when they’re displayed in a post. We export our images at 1000 pixels so that they’re sharper on retina devices, but not so large that they slow down the site.
An easy way to determine how many pixels wide images appear on your site is to take a screen shot of an image on your site. On an Apple computer, press Command + Shift + 4. You should see a pixel count to the right of the cursor similar to the image below.

If you export images directly from Lightroom, you can apply the same principles. Export them about 40% larger than they are displayed on your website and sharpen the images for web.
How to add Alt-Text to Images
Alt-text, or alternative-text, is the text displayed by a website when it can’t load an image. It’s also used by visually impaired people who would not be able to see the image.
Search engines use the alt-text to better understand what a page or post is about. For instance, an image with the alt-text “Bride and groom walking on the beach at the Chesapeake Bay Beach Club” would suggest the page is about a wedding. Specifically, a wedding at the Chesapeake Bay Beach Club. (The alt-text you use will also be what appears when someone pins the image in Pinterest.)
If you’re using the Yoast SEO plugin, you’ll see one of the indicators is associated with writing alt-text. The plugin suggests using the targeted keyword in the alt-text of an image at least once.
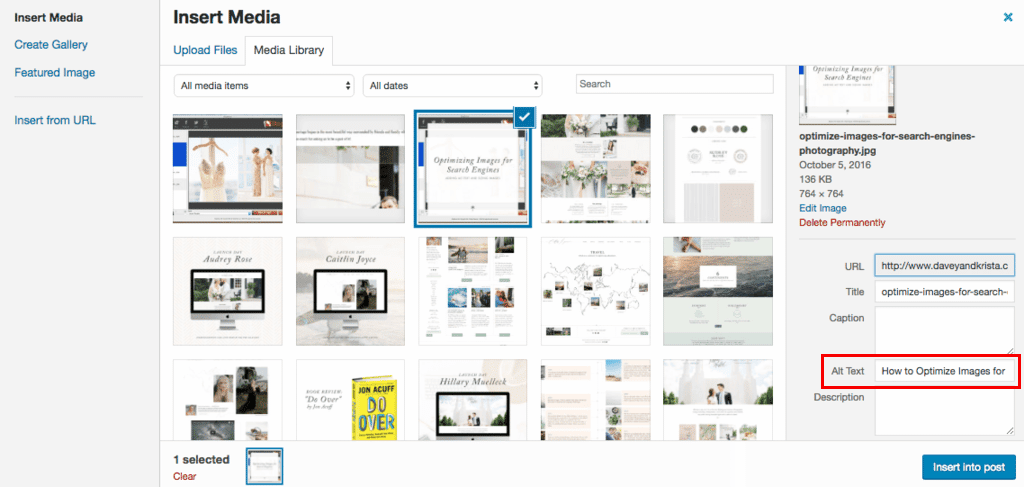
In WordPress you can add alt-text to an image when you load it, or by clicking on an image in the post editor. Use the Add Media tool to upload or select an image. After selecting or uploading an image, fill in the Alt-Text box. The image you’re using should be relevant to the text, so try to use the keyword in the alt-text. Do not use it if it’s not relevant.

(If you use Squarespace, follow these directions.)
Alt-text helps Google deliver search results for images, too. It’s important to be as accurate as possible in describing the image and it’s purpose just as one would in writing titles and descriptions for a blog post. Remember, one of the primary reasons to provide alt-text is for visually impaired.
We hope this helps! And if you have any tips for optimizing images, we’d love to see them in the comments.
VIEW THE COMMENTS
Add A Comment