


Table of Contents
Every time someone installs a new Showit template, the first instinct is the same: jump straight into the canvases and start making it look like theirs.
I completely understand that feeling. The template is beautiful and you’re excited. But there are five things I always recommend doing before you touch a single canvas, and if you do them in order, everything that comes after goes so much faster.
This is my go-to Showit starter guide for anyone who just installed a template and isn’t sure where to actually begin.
1. Swap In Your Brand Colors
The very first thing I do on every single build is bring in the brand colors. This one step updates the look of your entire site at once, which is why it has to happen before anything else.
Here’s how to get there: open Design Settings in the top left corner of Showit. Under the Brand Colors tab, you’ll see eight color slots. These are the colors assigned throughout your entire site, to your text, your buttons, your backgrounds, your shapes. When you change them here, they update everywhere at once. That’s why this step is so powerful.
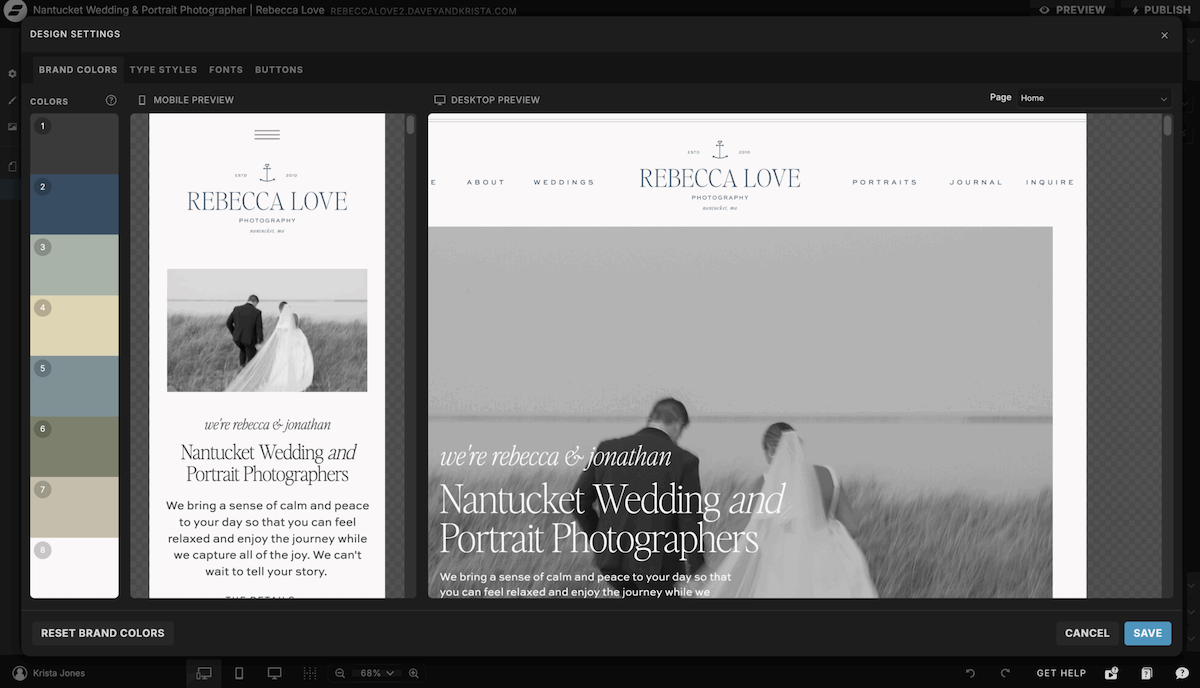
When you’re swapping colors in, think about it this way: you’re matching dark for dark, light for light, and neutral for neutral. If the template has a dark color in the first slot, put your darkest brand color there. If there’s a light neutral, put your lightest neutral there. If the text color in the template is almost black and your brand uses a very dark gray, your dark gray goes in that spot.
The goal is to keep the same balance of light and dark that the template was designed with, just in your colors instead of ours. If you put a light color where a dark one was, things will stop being readable. Keep the same relative weight and you’ll be fine.
If you don’t have a color palette yet and aren’t sure where to start, we have a few resources that can help. Our post on 2026 brand color trends is a great starting point, and 101 of Our Favorite Color Palette Combinations walks through designer-approved color palettes.
2. Import Your Fonts and Delete the Ones You Won’t Use
Once your colors are in, the next step in any solid Showit starter guide is getting your typography sorted.
Go back into Design Settings and click the Fonts tab. This is where you’ll import any custom fonts you’re planning to use on your site. If you purchased fonts or have licensed ones for your brand, they’ll need to be in WOFF format to upload. The Showit help center has a step-by-step guide for adding custom fonts here, and it’s genuinely straightforward once you follow it through.
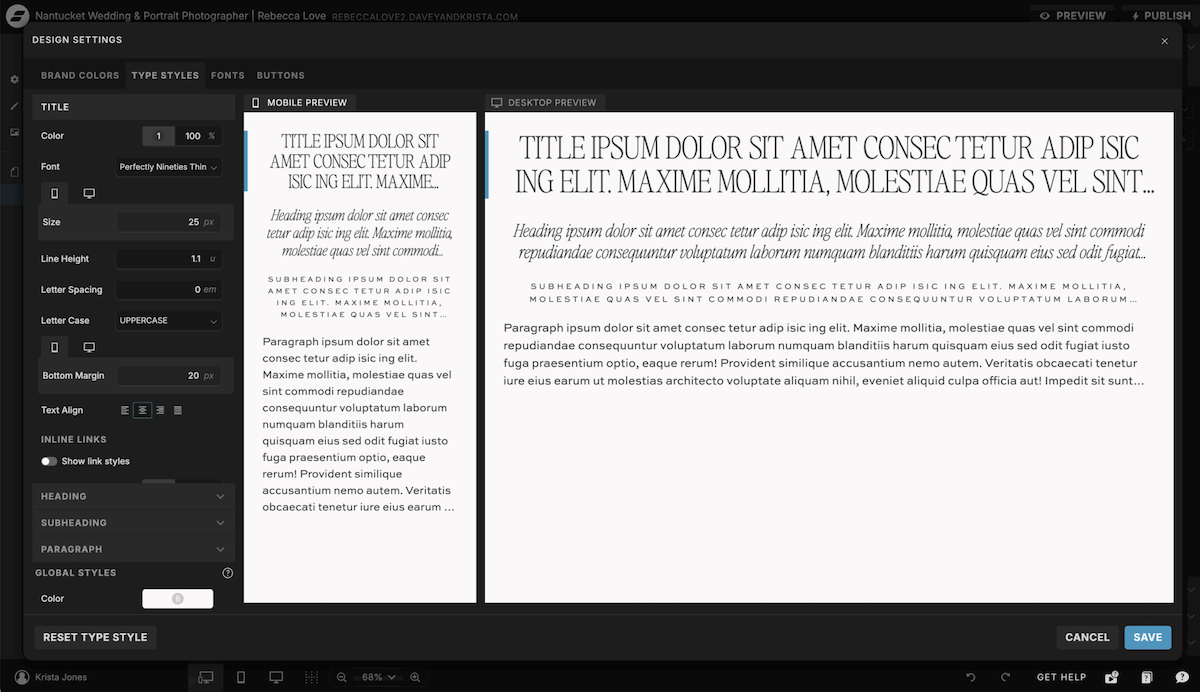
After you bring your fonts in, delete the template fonts you won’t be using. This is a step a lot of people skip, and then they end up with a confusing library full of options that aren’t theirs every time they try to style a text element. Keep it clean. Only what you’ll actually use.
3. Apply Your Fonts to the Heading Styles
This is the step that does the most work for the least effort, and it’s one of my favorite parts of any Showit starter guide.
Once your fonts are imported, stay in Design Settings and go to the Type Styles tab.
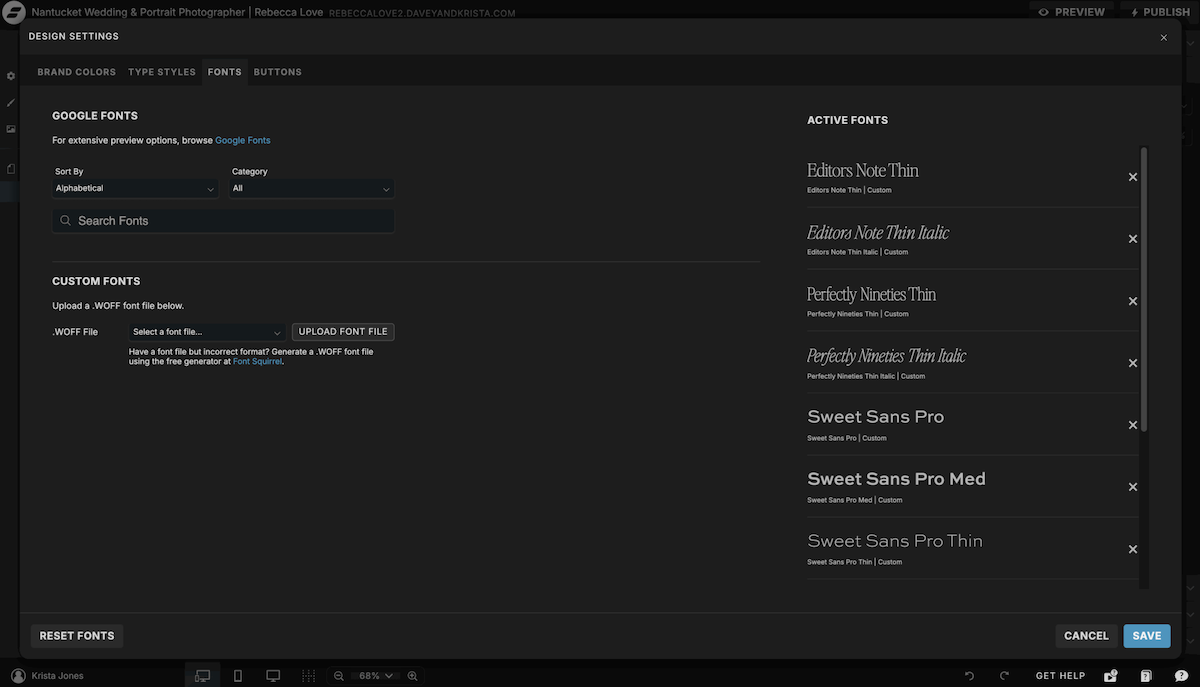
This is where you assign your fonts to your heading styles globally, things like your H1, H2, H3, and body text. When you set it here, it updates across your entire site in one move. You’re not going canvas by canvas changing every headline manually. You do it once and it cascades through.
Take the time to do this before you start building your pages. Future you will be very grateful.
4. Gather and Organize Your Images
Before you start placing a single image on any canvas, gather every photo you’re planning to use on your site and put them all into one folder on your computer first.
This can be your own photography, stock images, AI-generated images, anything you’re planning to use throughout the site. The important thing is having them ready and organized before you start so you’re not stopping mid-build to hunt for a photo you know you have somewhere.
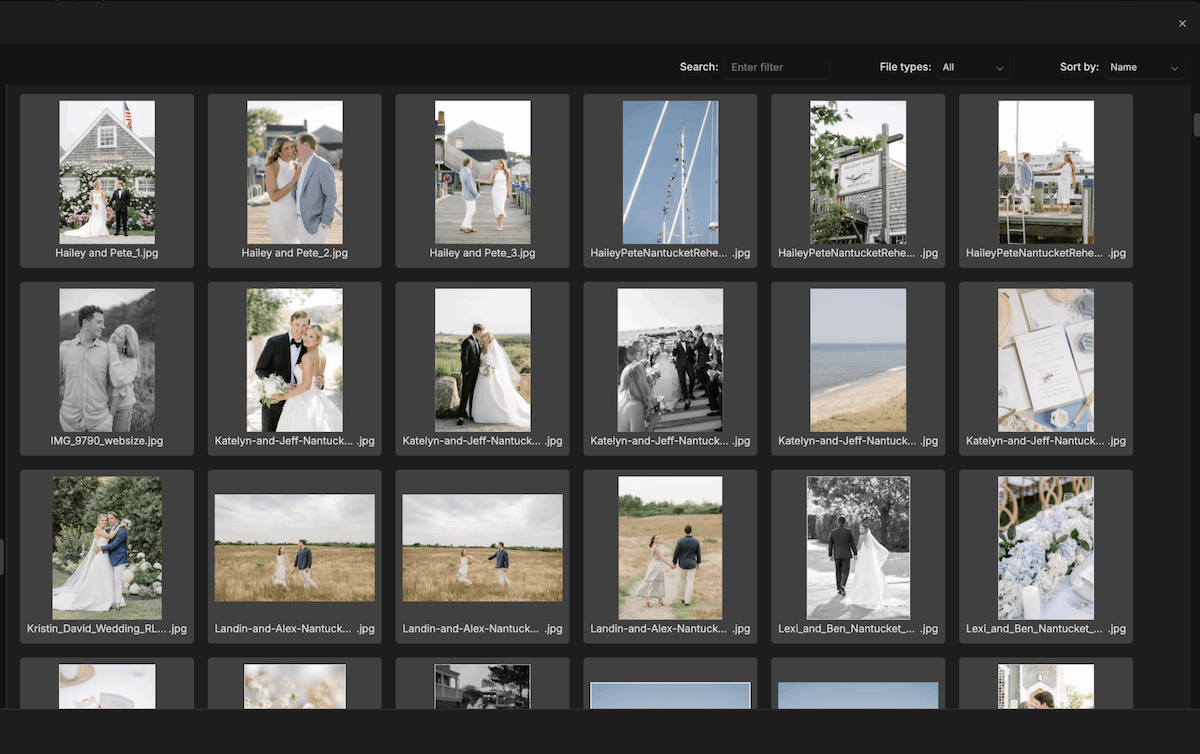
And before you bring anything in, make sure your images are sized and compressed for the web. Uncompressed images are one of the most common reasons websites load slowly, and a slow site loses visitors fast. We have a full walkthrough on how to reduce your image sizes significantly using TinyPNG, and it’s worth doing before you upload a single file.
Once your images are web-ready and in a folder, you’re set. The build moves so much more smoothly when you’re not solving this problem in the middle of it.
5. Name Your Pages and Set Up Your Navigation
The last step in this Showit starter guide before you touch the canvases is to go into your pages, think through the structure of your site, and get everything named and linked correctly.
Look at the pages that come with your template and decide which ones you’ll keep, which ones need a new name, and whether you need to add any pages your business uses that aren’t there yet. If you need a page that doesn’t exist yet, duplicate an existing page rather than starting from scratch, because the styling and structure are already there.
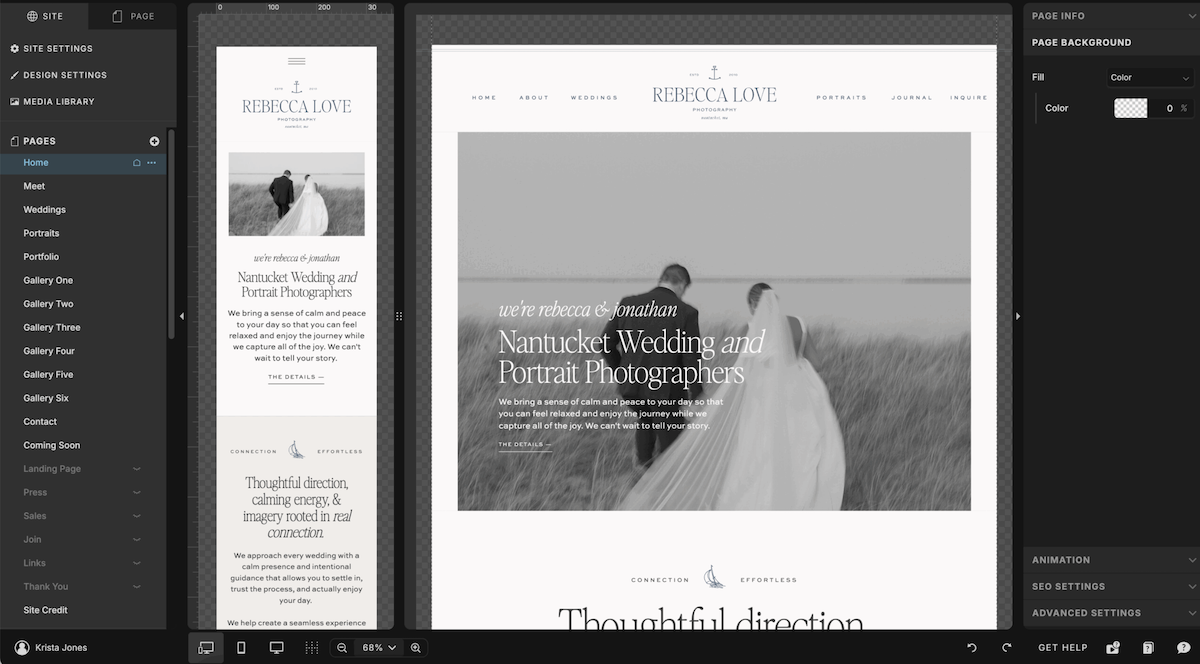
Then check your navigation and make sure it’s linking to the right places. Getting your page structure right before you start building your content means you can actually click through your site as you go and see it working. If you wait until everything is built to figure out the navigation, you end up doing a lot of troubleshooting you could have skipped.
Why This Order Matters
I know the canvases are where you want to be. That’s where it starts to look like your business, and that’s exciting.
But I’ve built enough of these sites to know that the setup phase is what determines how smooth everything else is. When your colors are globally applied, your fonts are ready and assigned, your images are compressed and organized, and your pages are named and linked, you can move through the actual content build with real momentum instead of stopping every ten minutes to solve something you could have handled at the start.
You’re not slowing down. You’re setting yourself up to go fast.
If you’re just getting started with Showit and want step-by-step guidance through the full build from setup to launch day, our course The Launch Plan walks you through all of it. And if you’re still looking for a template to build on, browse our Showit template shop here.
Not on Showit yet? Grab your 30-day free trial here. It’s the platform I use, teach on, and would choose again every time.
FAQs: Showit Starter Guide
What should you do first when you open a new Showit template?
Before you touch the canvases, go into your Design Settings and update your brand colors, import and assign your fonts, organize and compress your images, and name your pages. Doing these five things first means everything that follows goes significantly faster.
How do you add brand colors to Showit?
Go to Design Settings in the top left corner of Showit, then click the Brand Colors tab. You’ll see eight color slots that are assigned throughout your site. Enter your brand hex codes into the matching slots, keeping the same balance of dark and light that the template was designed with. When you save, your colors update across the entire site at once. Showit’s full guide is here.
How do you add custom fonts to Showit?
Go to Design Settings and click the Fonts tab. If you have a custom font, it needs to be in WOFF format to upload through your media library. Once it’s uploaded, you can add it to your active fonts and assign it to your heading and body text styles. Showit’s step-by-step guide is here.
Do images need to be resized before uploading to Showit?
Yes, always. Full-resolution images significantly slow down your site, which affects both user experience and search rankings. We have a full walkthrough on how to compress your images using TinyPNG before you start uploading.
Where can I find a Showit template to get started?
Browse our full template shop here. Every template is built with strategy and structure already in place so you’re customizing, not starting from scratch. And if you want step-by-step guidance through the build, The Launch Plan walks you through the full process from first login to launch day.

Krista is the co-founder of Davey & Krista, a creative studio known for high-converting Showit website templates crafted for photographers, creatives, and entrepreneurs. With over 15 years of branding and marketing experience, she helps business owners launch stunning websites without the tech overwhelm. Krista also teaches designers how to turn their creative skills into a thriving business—through templates, courses, and behind-the-scenes strategy. When she’s not designing, you’ll find her chasing sunshine, color palettes, and gluten-free pizza.
Explore website templates and free resources at daveyandkrista.com.


VIEW THE COMMENTS
Add A Comment