


Table of Contents
Let me guess. You’ve been looking at Showit templates for a while now. You’ve got a rough idea of what you like. Maybe you’ve even added one to your cart and then talked yourself out of it because you weren’t totally sure it was the right one.
That moment of uncertainty makes complete sense. A Showit template is a real investment and you want to get it right. The good news is that once you know what to actually look for, the decision gets so much clearer.
Here’s what I’d tell you: start by thinking about your industry and how you want someone to move toward booking you when they land on your site. Then match the layout to your brand style, not the demo photos, because those aren’t your photos anyway. And before you buy anything, check what’s included, because the writing prompts and launch checklist inside every Davey & Krista template are honestly what make the difference between a site that launches and one that sits in your downloads folder forever.
That’s the short version. Let me walk you through how to choose and use a Showit template.
Step 1: Start With Your Goal, Not the Pretty Photos
I know the demo images are gorgeous. That’s kind of the whole point of a template preview. But here’s the thing: those photos are not your photos. When you install the template and swap in your own images and colors, it’s going to look completely different.
What you’re actually buying is the layout. The structure. The flow of the site. And THAT is what needs to fit your business, not the lifestyle imagery in the demo.
So before you fall in love with anything, ask yourself one question: what do you want someone to do when they land on your site?
Do you want them to fill out an inquiry form? Purchase a program? Browse your portfolio and reach out? The answer tells you what pages you need and how those pages should be structured.
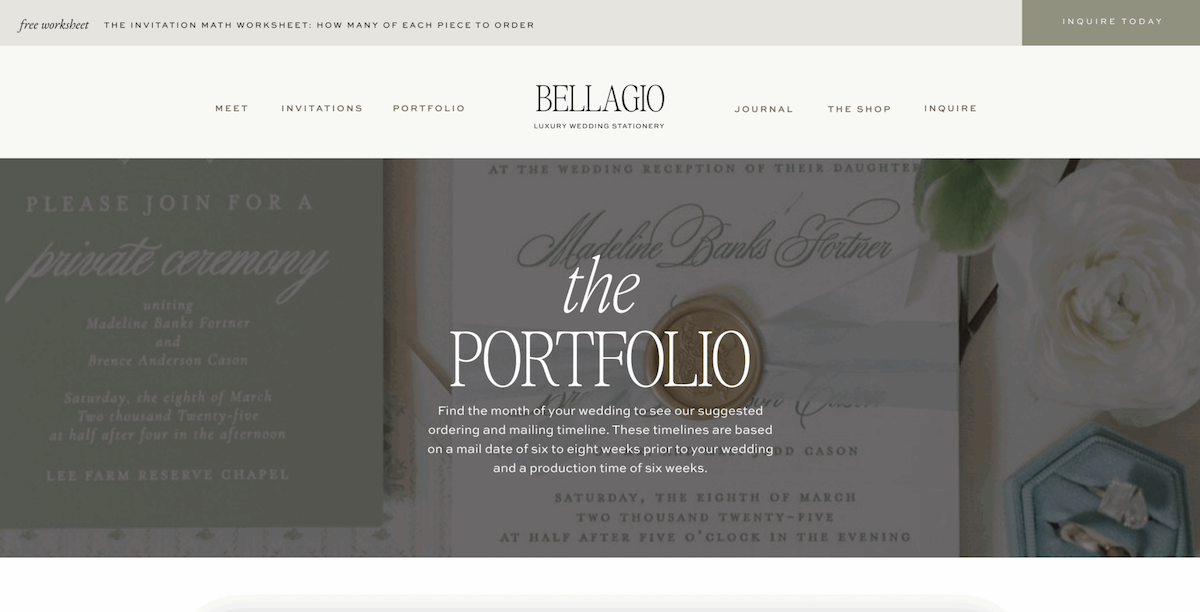
A wedding photographer needs generous gallery space and a clear inquiry path. A coach needs a dedicated program page and a booking link that’s impossible to miss. A stationer, like the designers who use our Bellagio template, needs structured pages for showcasing suites and walking a client through a process they’ve likely never done before.
The layout has to match how your business actually works. Get clear on that first and everything else falls into place.
Step 2: Match the Style to Your Brand, Not the Demo
NOW you can look at the pretty photos. But you’re looking at them differently.
Instead of asking “does this look like my brand right now,” ask “does this layout feel like the aesthetic direction I’m heading?” There’s a meaningful difference between those two questions, and it changes everything about how you evaluate a template.
At Davey & Krista, our templates generally fall into a few style directions.
Editorial and refined. Think Amelia Island. Generous white space, sophisticated typography, layouts that feel considered and timeless. If your brand is elevated and intentional, this is probably your direction.
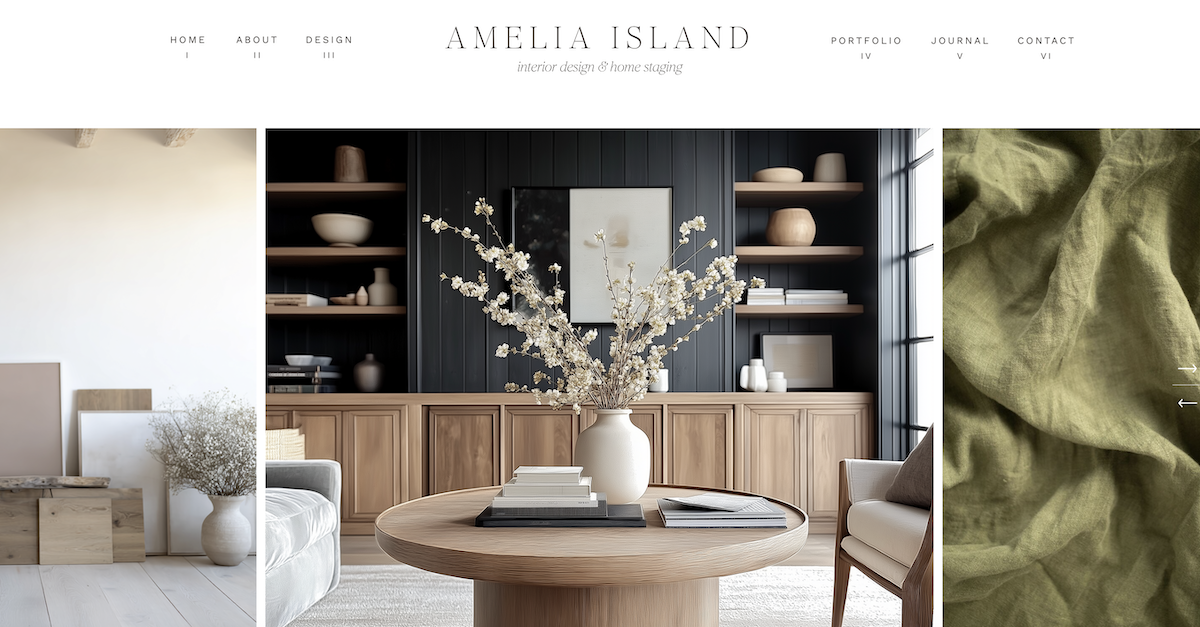
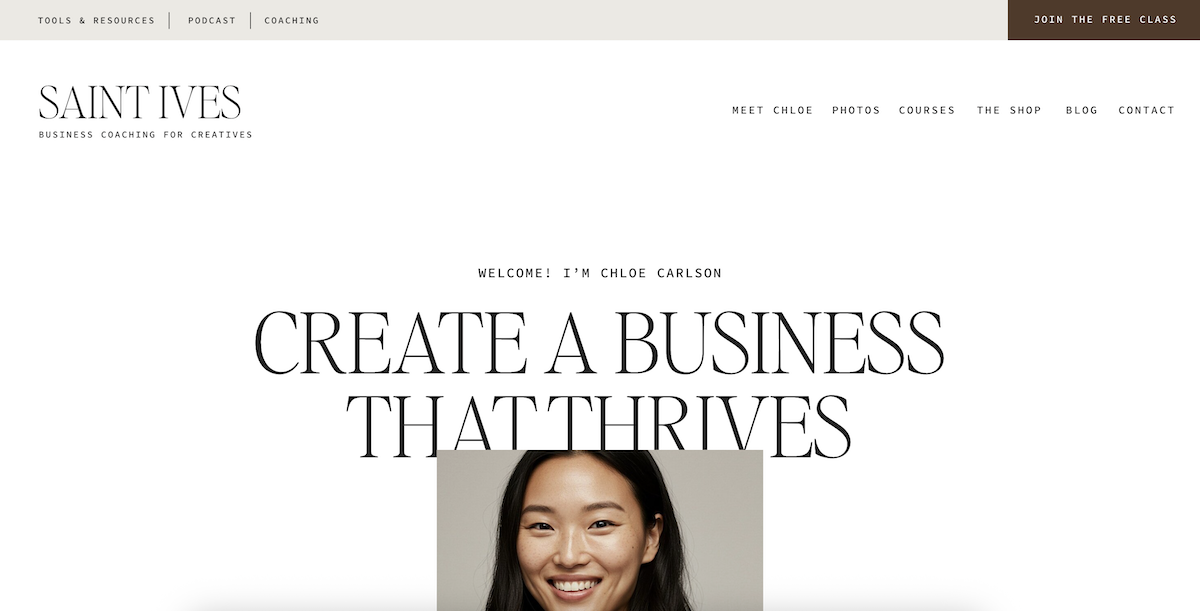
Clean and minimal. Like St. Ives. Everything stripped back to what actually matters. Your content gets to lead and the design gets out of the way. These tend to be the fastest to customize and work beautifully across a wide range of niches.
Rich and detail-driven. This is where Bellagio lives. Built for businesses where the detail of the work itself needs to be front and center, with structured pages that walk a potential client through process, timeline, and exactly what they’re investing in.
When you’re browsing, look past the colors and photos and focus on the structure. Is the flow logical for your kind of client? Does it give you space for the things you actually want to say? That’s what you’re really evaluating.
Step 3: Check What’s Actually Included Before You Buy
This is the step that separates a template that launches from one that sits in your downloads folder collecting digital dust. And yes, that happens more than you’d think.
Not every template shop includes the same things, and if you’re new to this, what comes with your purchase matters enormously.
Writing prompts for every section. Every section of every Davey & Krista template has a prompt that tells you what kind of message belongs there and what your visitor needs to understand at that point in the page. The blank page problem is REAL, and it’s one of the most common reasons people buy a template and never launch it. Writing prompts take that problem completely off the table.
A launch checklist. There are more moving parts to going live than most people expect. A checklist means nothing slips through, like discovering your contact form was broken three weeks after you announced your launch. Trust me, you don’t want to find that out the hard way.
A tutorial video. Every full template in our shop comes with a walkthrough video made specifically for that design. So you’re never poking around wondering where things live or how to make an edit.
Real support. Things come up. Questions happen. Look for a shop with a team you can actually reach. We’re at [email protected] and we genuinely respond.
Step 4: Customize Without the Overwhelm
Here’s the order I’d follow, because doing things in the right sequence makes the whole weekend feel calm instead of chaotic.
Colors and fonts first, BEFORE you touch any canvases. Go into Design Settings and update your brand colors and fonts at the global level. When you do this first, they update across your ENTIRE site at once. It’s one of those Showit moments that genuinely feels like magic, and it gets your template looking like yours in about twenty minutes.
Work through the writing prompts page by page. Homepage first, then services or portfolio, then about, then contact. Read each prompt, fill in your story, and then read it back out loud. If it doesn’t sound like something you’d actually say to a real person, adjust it until it does. You know your business better than any prompt ever will. The prompts just give you the framework to work from.
Drop your images in last. Once your copy is in, bring your images in from a folder you’ve prepared in advance. Make sure everything is compressed before you upload it. We have a full guide on how to do that here if you need it. Uncompressed images are one of the most common reasons sites load slowly, and a slow site is not a great first impression.
Check your mobile view before you do ANYTHING else. In Showit, you design your mobile site separately from your desktop, which means you have full control over how it looks on a phone. This is one of the most powerful features of the platform. It’s also one of the most commonly skipped steps in a weekend build. Go through every single page in mobile view and make sure everything looks right before you call it done.
Step 5: Publish and Connect Your Inquiry Form
Almost there. Before you hit publish, two things absolutely have to be working.
Your contact form needs to be connected and tested. Fill it out yourself right now. Make sure the submission lands in your inbox. If you’re using Dubsado for client management, confirm the workflow triggers correctly. A site that’s live but has a broken contact form is technically open for business but not actually open for business. Big difference.
Your basic SEO needs to be set up. Go through each page and set a page title, a short description called a meta description, and alt text on your images. These are the fields that tell Google what your pages are about, and setting them before you launch means you’re starting with the right foundations from day one. Our Showit SEO Course goes much deeper on this when you’re ready.
Once those two things are done, you’re ready to submit your launch request to Showit. Their team handles connecting your domain for you, which is genuinely one of my favorite things about this platform.
And then you’re live. That’s it. That’s the whole thing.
Still Not Sure Which Template Is Right for You?
Every creative business is different, and the right template really does depend on your industry, your aesthetic, and what you need your site to do.
If you’re not sure where to start, take our free Find Your Template quiz and we’ll point you in the right direction based on your specific business and style.
Or browse the full Davey & Krista shop here and see what feels right. Every template includes writing prompts, a launch checklist, and a walkthrough video so you’re never starting from nothing.
And if you want someone to walk you through the entire launch process step by step, The Launch Plan was made for exactly that.
FAQs
Is Showit good for beginners?
Yes, genuinely. Showit is a drag-and-drop website builder that requires zero coding knowledge, and when you start from a professionally designed template the layout decisions are already made for you. The Showit support team is also one of the most genuinely helpful in the industry, so if you get stuck you’re not on your own.
How do I install a Showit template?
When you purchase a Davey & Krista template you receive a share key in your purchase PDF. In your Showit account, go to Add to Library, paste the share key, and your template loads directly into your account. From there you select it and start customizing. The whole process takes about five minutes.
Can I change a Showit template after I launch?
Yes, everything in Showit is fully editable at any time. You can update colors, fonts, layouts, images, and copy whenever you want. Most people make small updates regularly as their business grows and evolves, and that’s exactly how it’s supposed to work.
How long does it take to customize a Showit template?
With your content prepared in advance, including your copy, images, and brand colors, most people can customize and launch a Davey & Krista template in a focused weekend. The writing prompts built into every template significantly reduce the time spent on copy, which is usually the slowest part of the whole process.

Krista is the co-founder of Davey & Krista, a creative studio known for high-converting Showit website templates crafted for photographers, creatives, and entrepreneurs. With over 15 years of branding and marketing experience, she helps business owners launch stunning websites without the tech overwhelm. Krista also teaches designers how to turn their creative skills into a thriving business—through templates, courses, and behind-the-scenes strategy. When she’s not designing, you’ll find her chasing sunshine, color palettes, and gluten-free pizza.
Explore website templates and free resources at daveyandkrista.com.


VIEW THE COMMENTS
Add A Comment